Kobo Modding
Table of Contents
Hello and welcome to the second post here, I’m still not used to writing these.
I’ve been intending to get an e-reader for a while now and I’ve just purchased one. Of course I’m not going to use it stock so I’m going to be documenting how and why I modify this thing; the thing here is referring to the Kobo Clara HD.
I’ll skip describing the device as there are plenty of videos and posts about it so I’ll just talk about what I have done. This post will also be updated time and again as new changes are done to the device.
1. Basics#
The most basic “hack” one can do to this device is to turn on the developer mode. This mode adds a few
additional settings to the settings menu and enables some beta features in the beta features menu.
All one has to do to enable this mode is to search “devmodeon” on the top right search menu. It might seem
as if nothing has happened with the search menu saying “We didn’t find any results. Try a new search term”
but this search has enabled the “dev mode”. You can turn it off as easily as you turned it on by searching
“devmodeoff” on the same menu.
1.1. SD Card Upgrade#
This part is a little more complicated. The Clara comes with an internal storage of 8GB, which is not really sufficient for anyone looking to read manga or nonfiction books such as university textbooks. Thankfully, the internal storage on this device is but a simple SD card, which is not glued in either.
For the upgrade, one obviously needs a new SD card to replace the existing one with, and a thin plastic object such as a card to remove the back cover with. The rest of the process is simple:
- Take out the back cover, revealing the internals, you only need to pry open the back cover with a thin
object, there are no screws or screwdrivers involved.
This video’s start demonstrates how easy it is to pry it open.
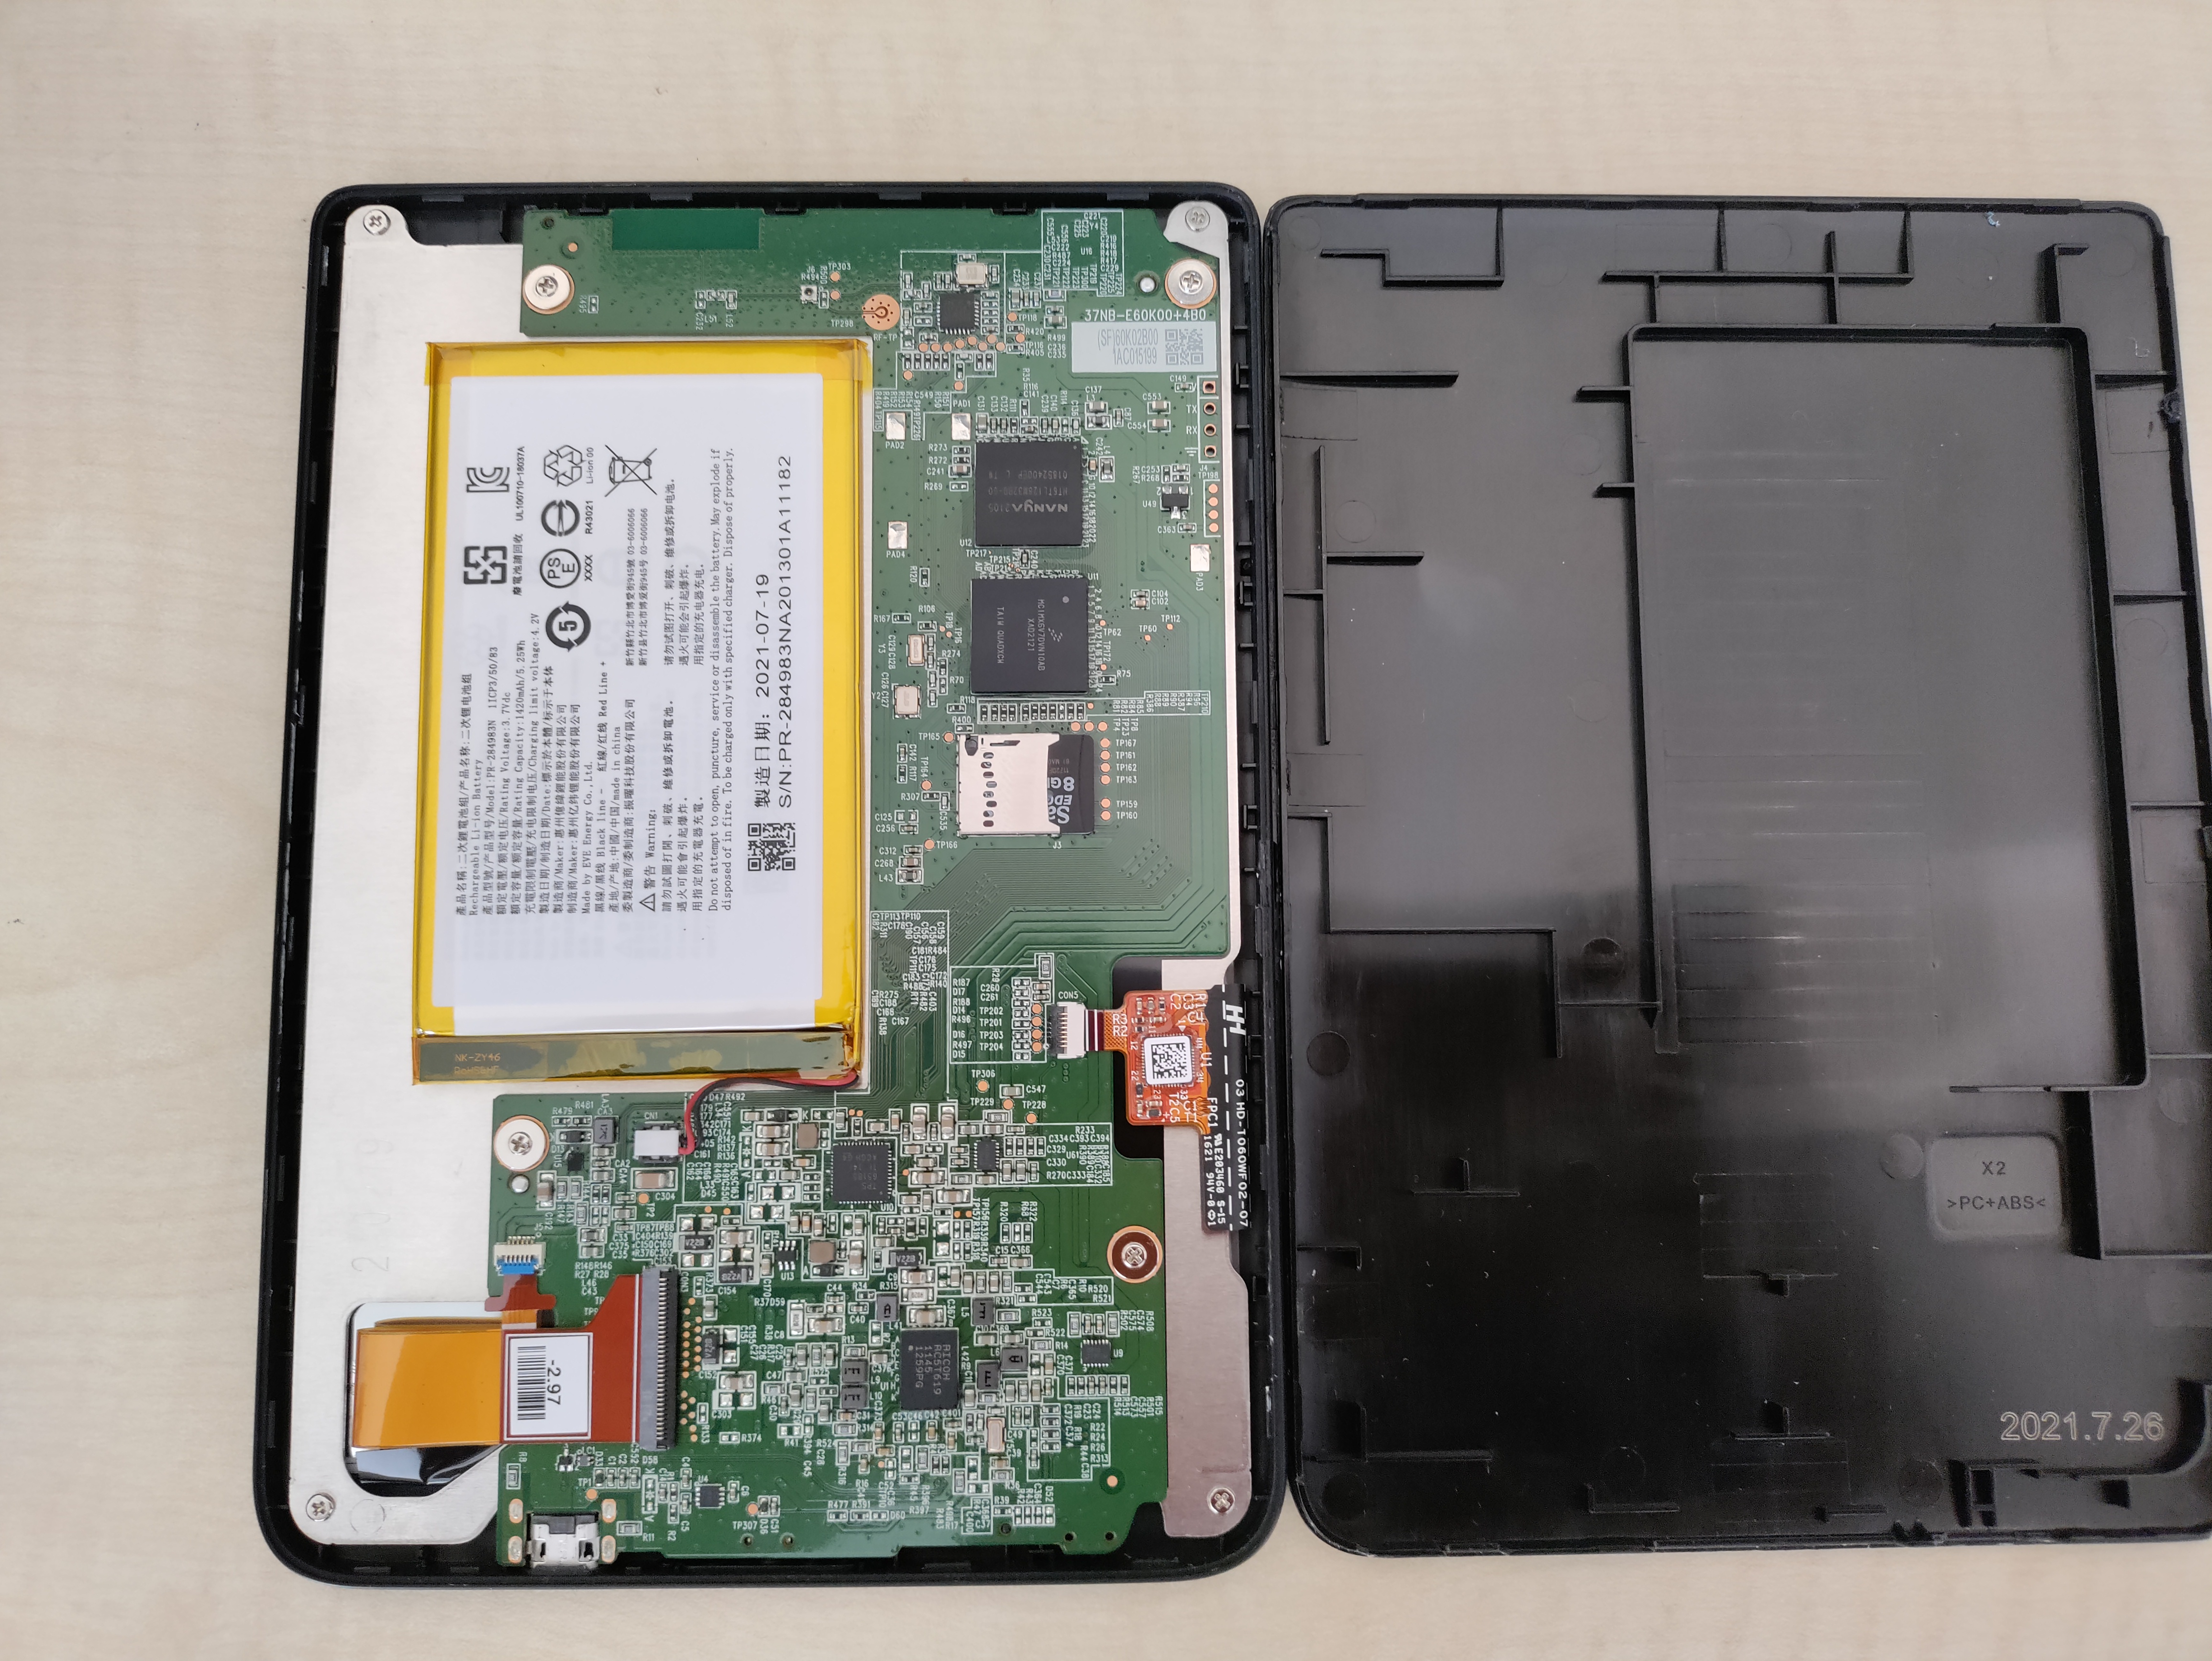 Do be careful to not damage any ribbons or SMD components, we do want to preserve our warranty after all :)
 - Remove the sd card, plug it into a USB adapter or something similar, and connect it to your Linux computer.
- Back up an image of the SD card, this might come in handy in the future for when and if you brick the
device and lose the original SD card at the same time.
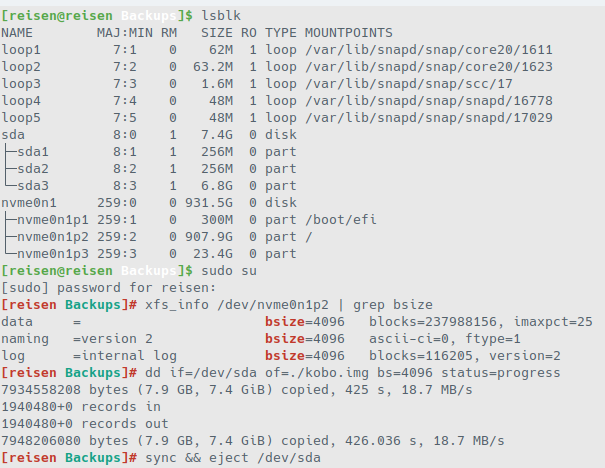 The block size argument while reading is really not that important, I just wanted to match it to my
filesystem’s.
The block size argument while reading is really not that important, I just wanted to match it to my
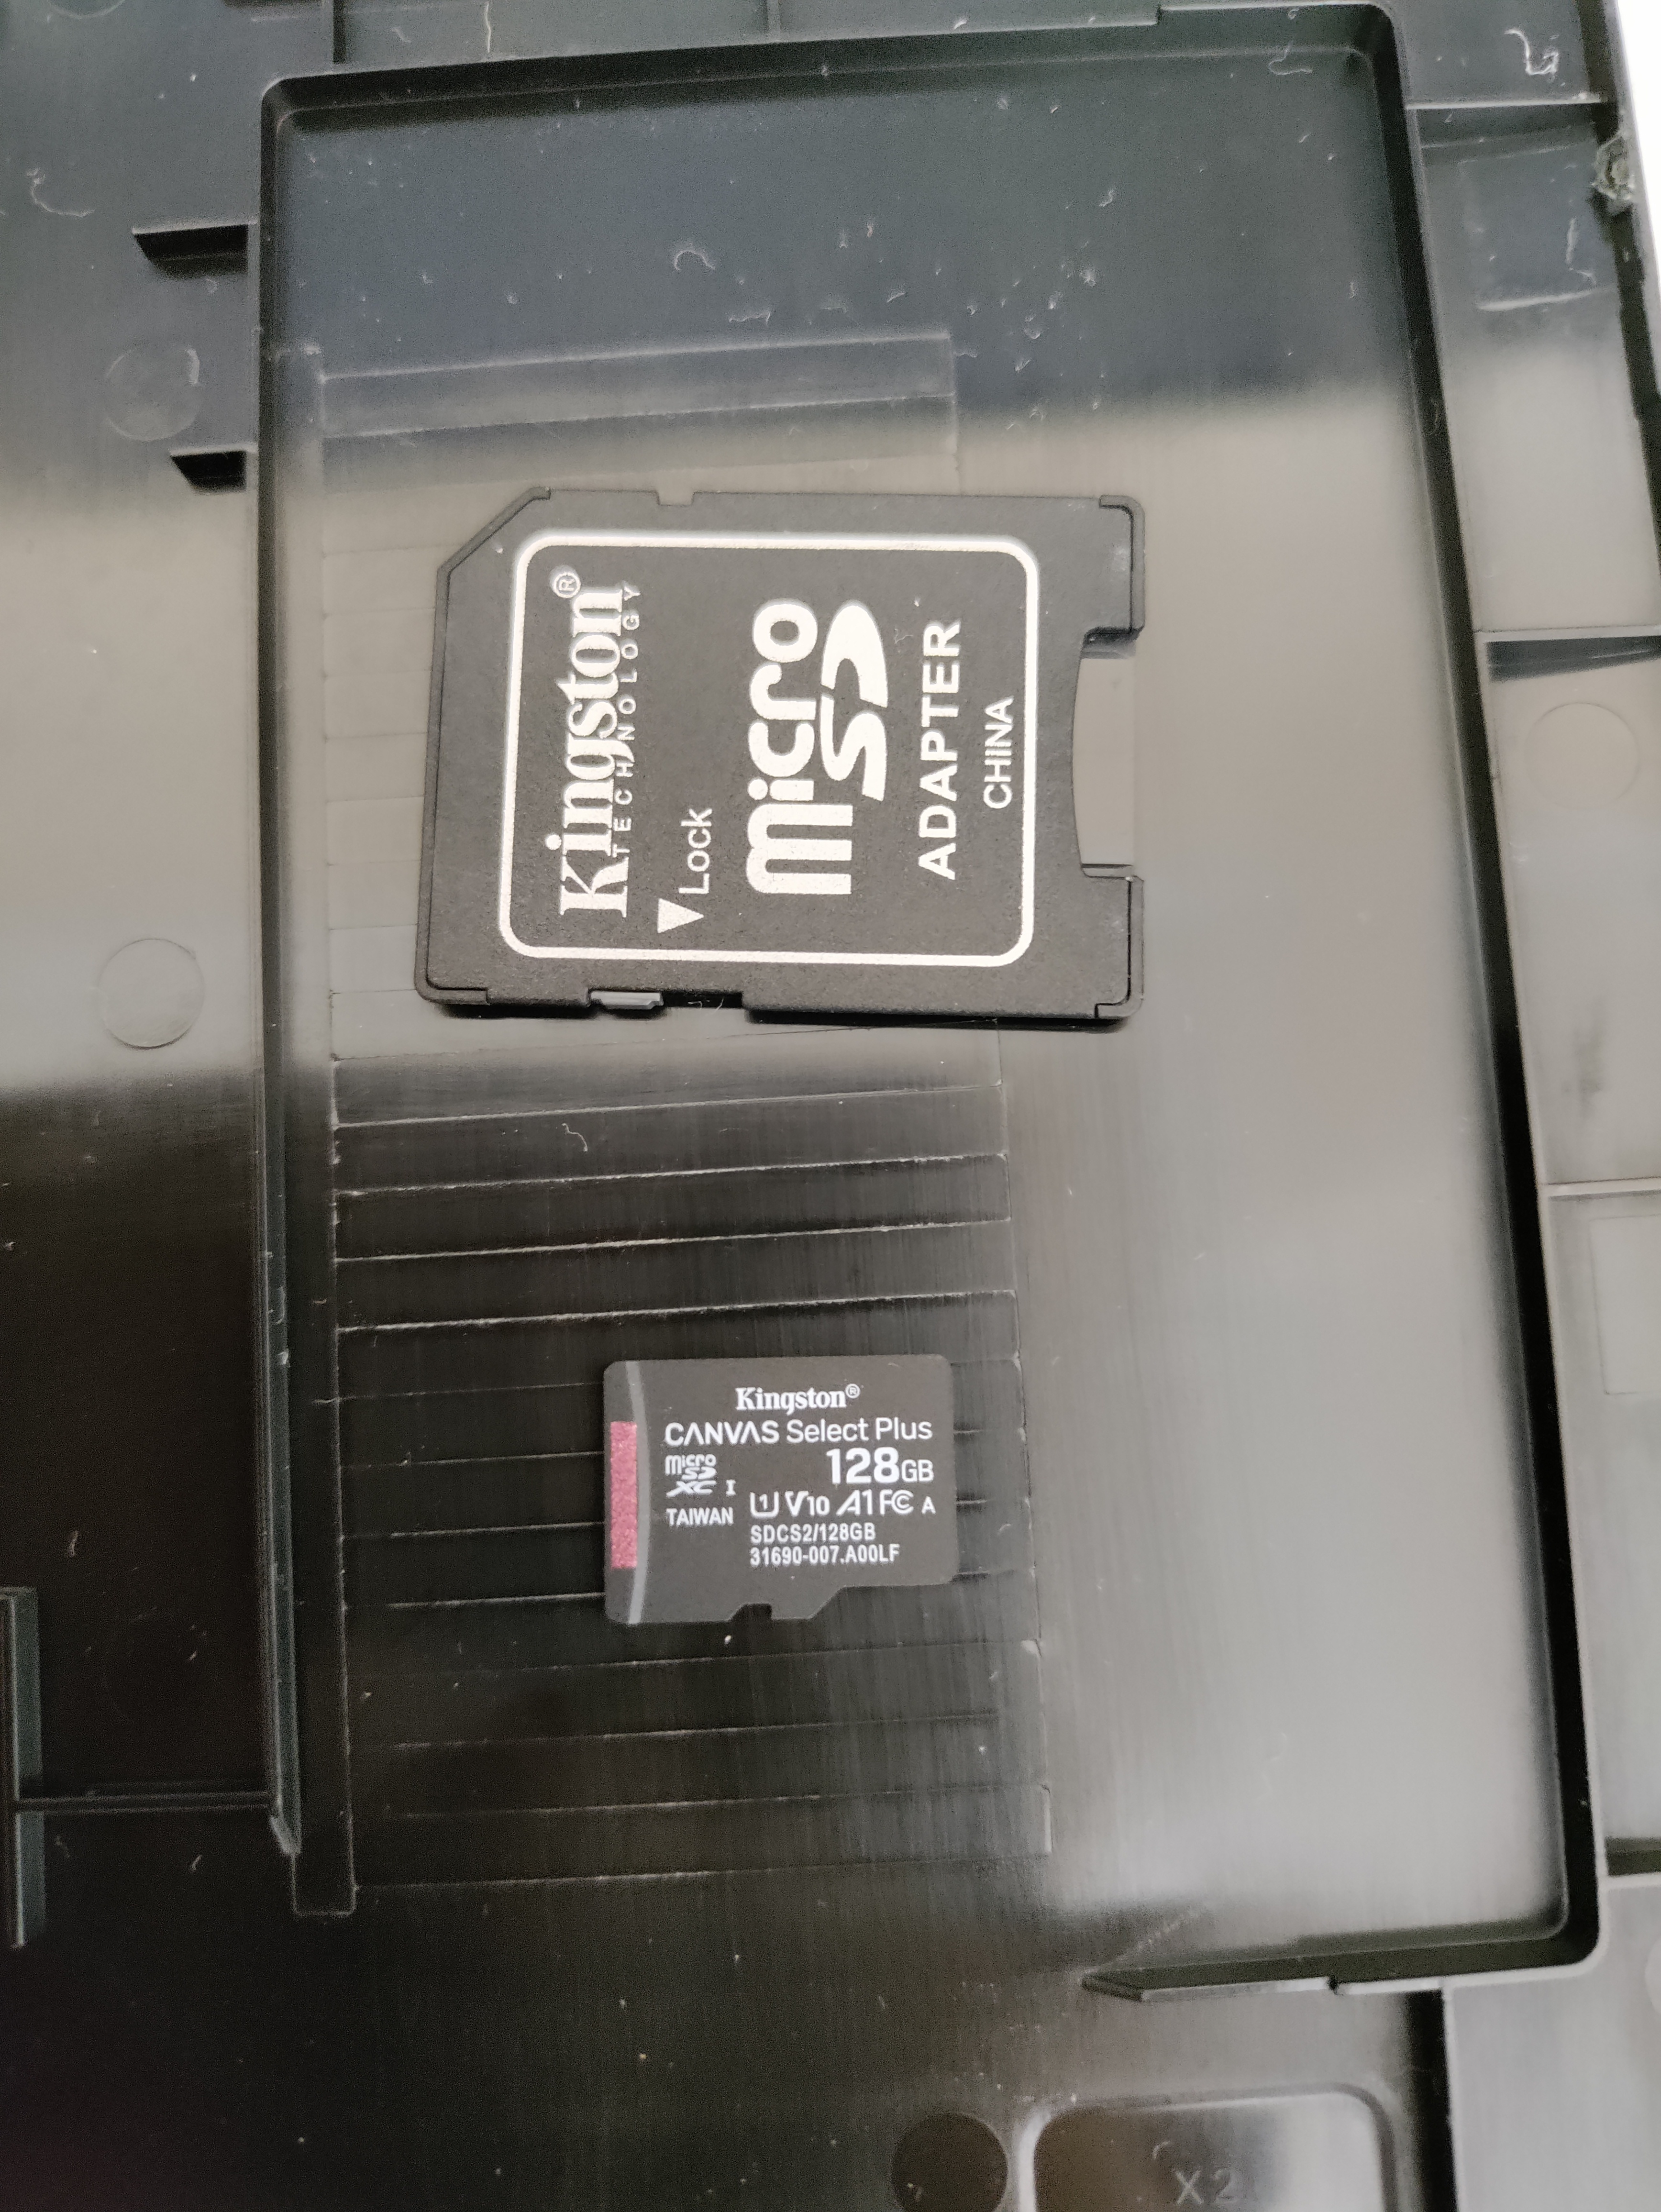
filesystem’s. - You may now plug out the old SD card and plug in the new One. I’m using a 128GB Kingston “Canvas Select
Plus” card. There are reports of people using 256GB cards as well but try large capacities at your own
discretion.
 Write the original card’s image to the new SD card.
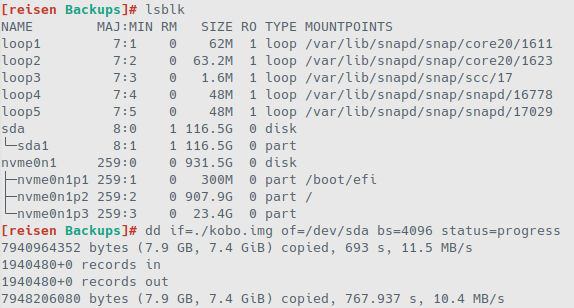 The block size argument is not really important as long as it is not miniscule or huge. i picked 4096 but
8192 might have also been a good one to use. Just know that if you pick a huge block size, the performance
will be better (though I don’t know by how much) but there will be wasted space for files that are not close
in size to a multiple of the block size and if you pick a really small block size, there will be a
performance penalty but less wasted space.
The block size argument is not really important as long as it is not miniscule or huge. i picked 4096 but
8192 might have also been a good one to use. Just know that if you pick a huge block size, the performance
will be better (though I don’t know by how much) but there will be wasted space for files that are not close
in size to a multiple of the block size and if you pick a really small block size, there will be a
performance penalty but less wasted space. - Use your favourite partitioning tool to extend the data partition of the new SD card. There will be three
partitions in total, the two 256MB ext4 partitions are not to be touched, the last FAT32 partition is the one
we’re interested in.
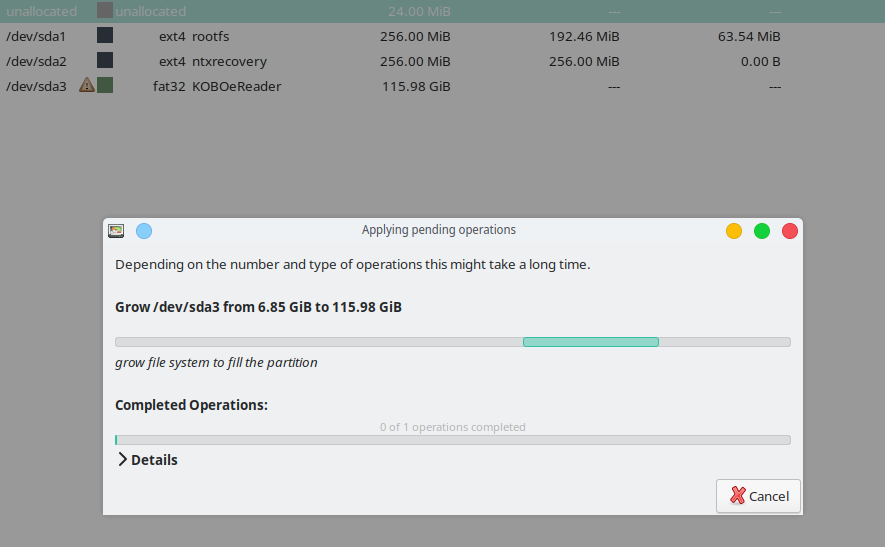
- Plug in your SD card and enjoy the extra space
To keep the original SD card safe, you can do what I did and store the original within the reader’s case
with some double sided tape:

1.2. ext4 for the 3rd partition#
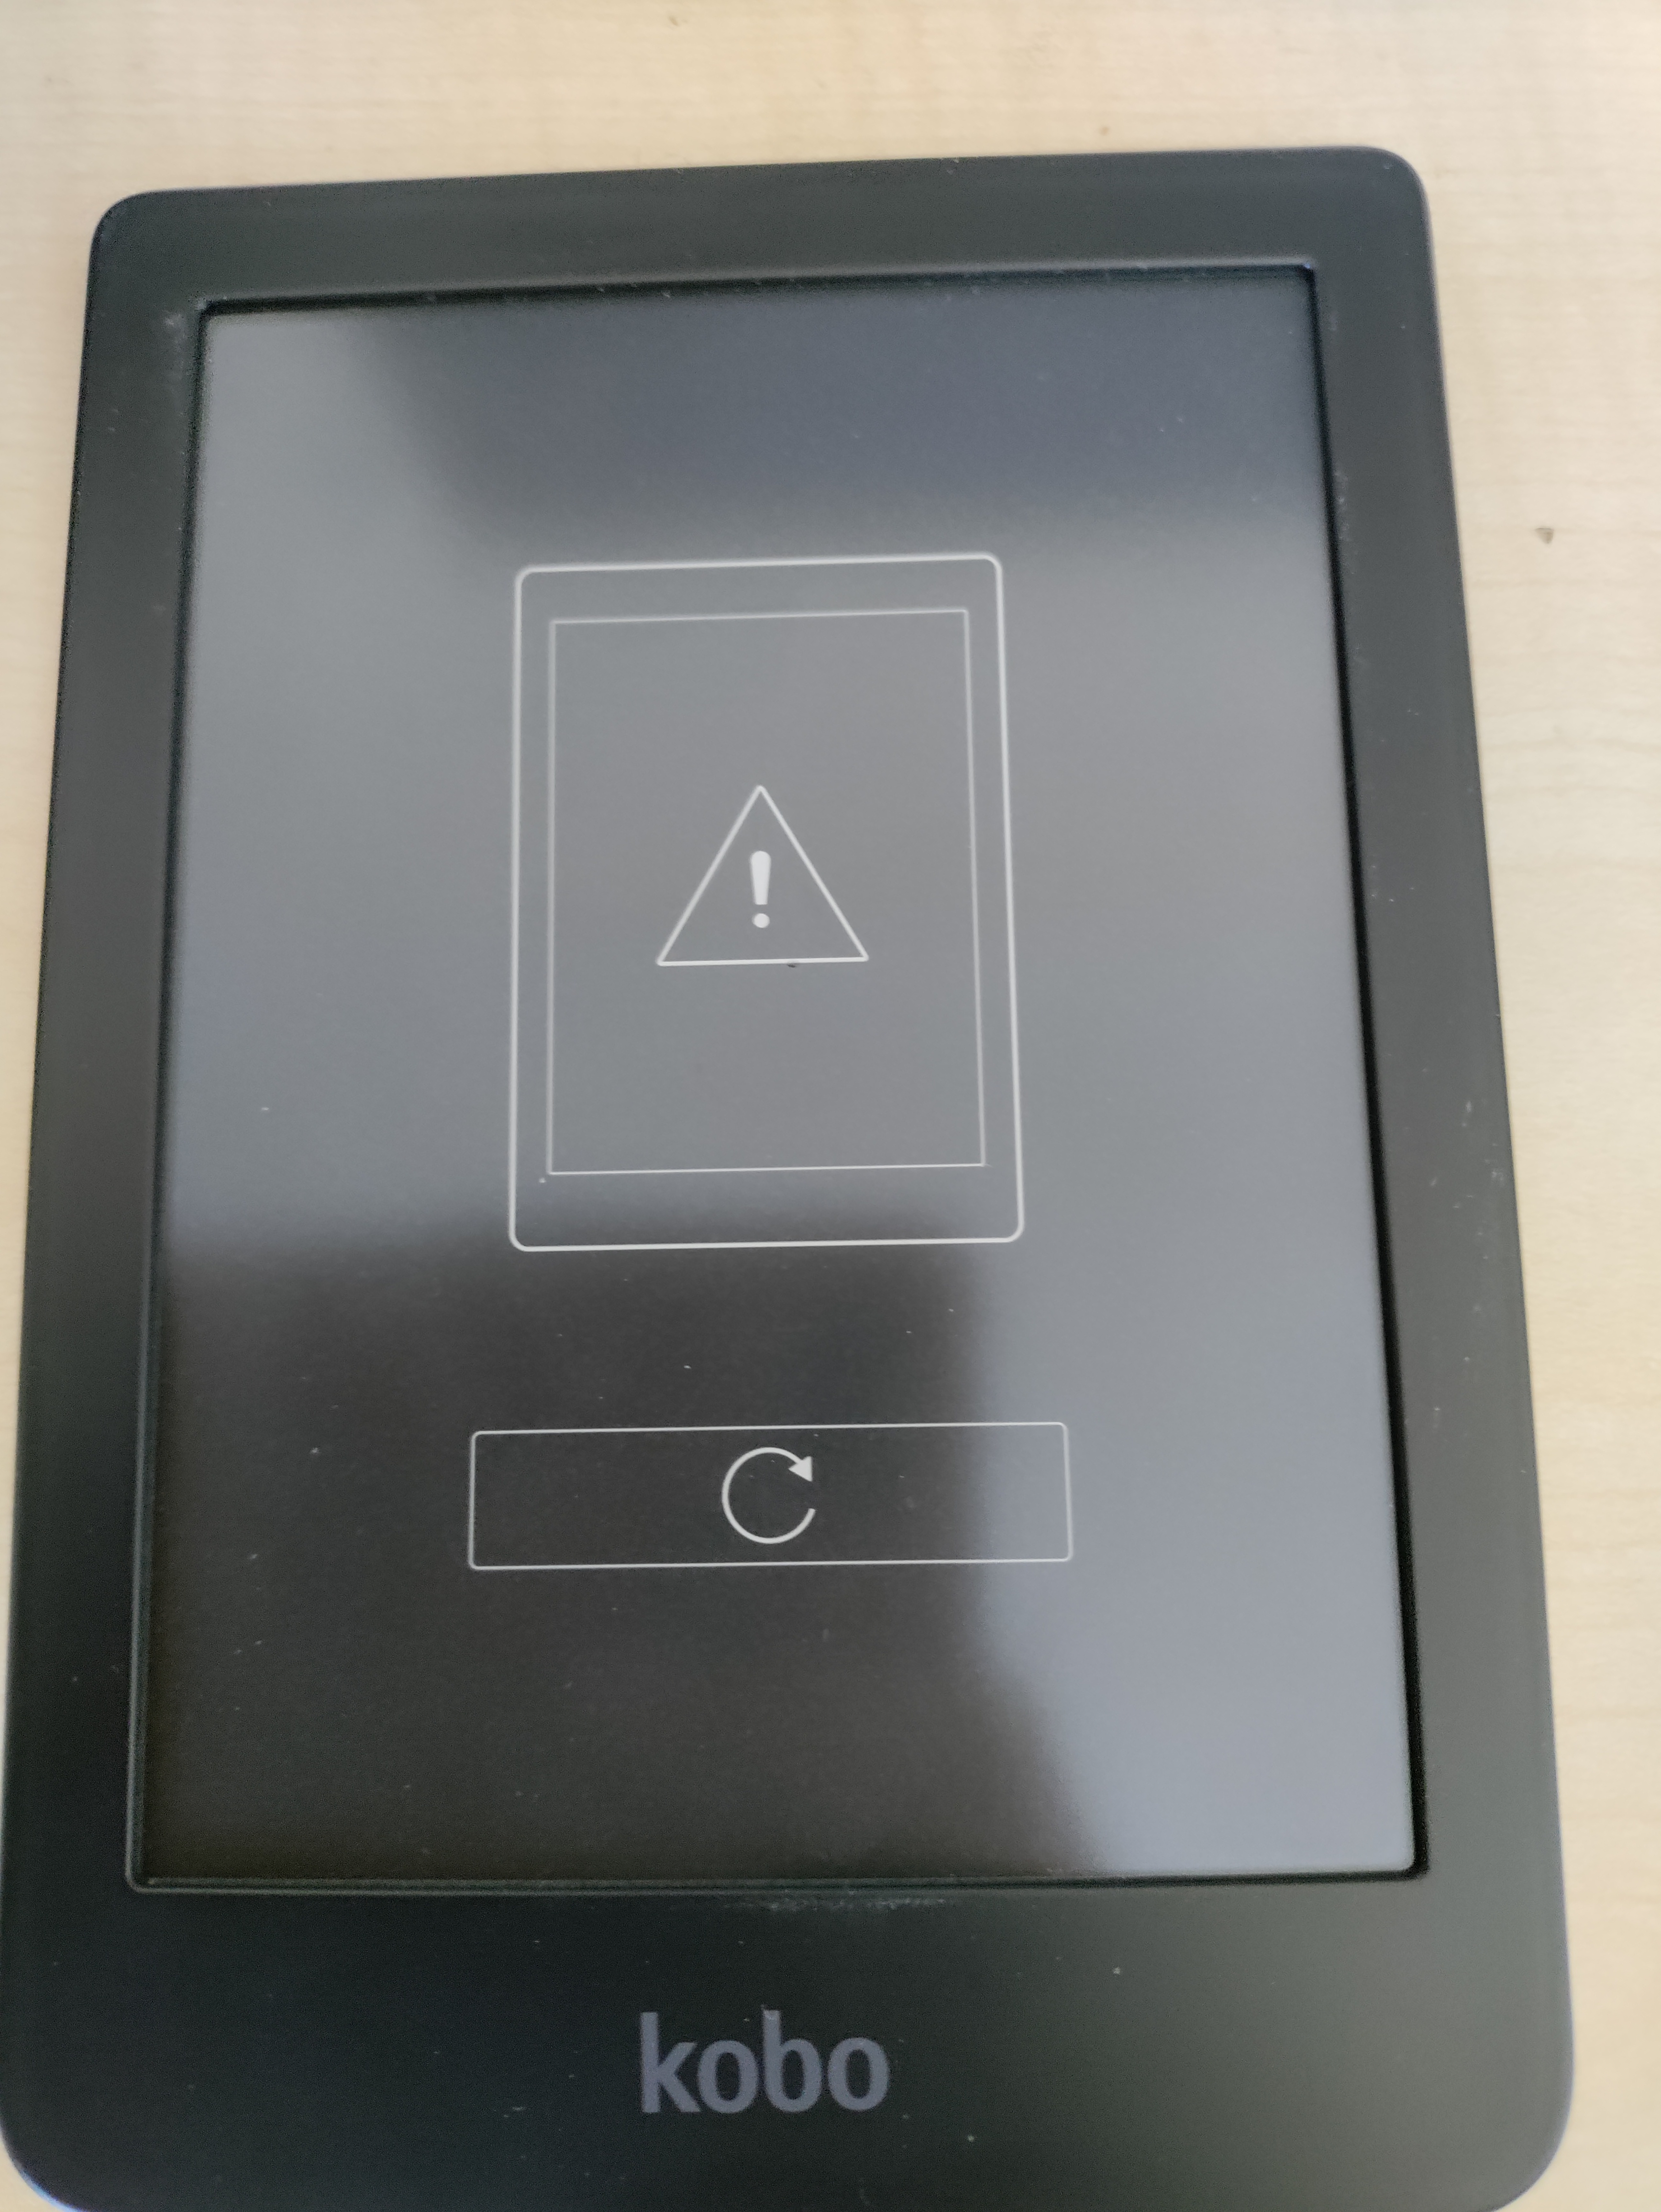
This one is a weirder hack, I don’t really trust FAT32 to handle 128GB worth of data properly and I want journaling on the data so I wanted ext4 on the 3rd partition (mmcblk0p3 in the reader’s perspective). Initially, I attempted to format the user partition to ext4 without changing anything else which failed with the following image being shown on the screen, presumably prompting me for a factory reset:
I then looked around on the internet and found a neat little hack a mobileread.com user frostschutz has made which I used to mount the ext4 partition. After copying over the files included in the tarball to /sbin on the rootfs partition, I could format the 3rd partition to ext4 and have it work. Well, not at the first try actually; On the first attempt the device displayed the same white-on-black error screen. I held the power button down until the indicator light stopped flashing and set the permissions of the files in the user partition to 777 which seems to have fixed the issue.
Just in case the files somehow become unaccessible from the site, here’s the tarball in question.
1.2.1. Hold on, don’t put the cover back on#
Putting the cover back on wasn’t the wisest idea, I did it, you shouldn’t.
There’s a tiny issue
that has been also discovered by a Clara user
that makes us so that we can’t view the contents of the Clara over USB. This is due to the Clara
only exposing FAT partitions when plugged in
via USB.
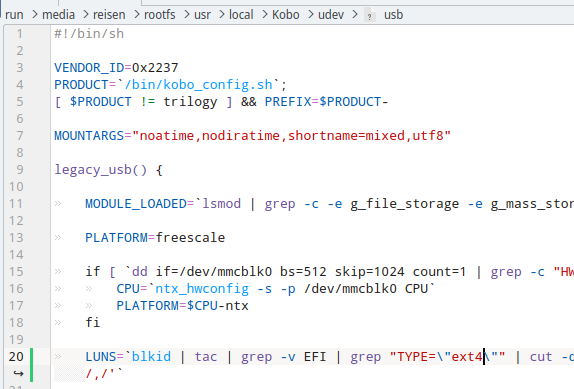
The fix is simple, though, you need to go to the file located inside rootfs in the directory
/usr/local/Kobo/udev/usb, open it with your favourite text editor, edit line 20 which makes an assignment
to a variable called LUNS, change the "TYPE=\"vfat\"" argument to grep to "TYPE=\"ext4\"" and you’re
golden. One side effect of this is that another partition will also be revealed to the computer which is
mostly fine.